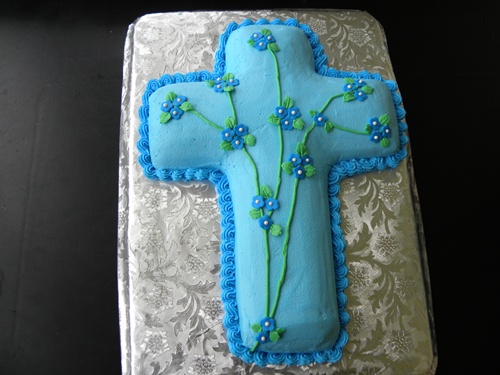
I made a cross cake for my nephew’s First Communion last weekend. This cake would also be great for a Baptism, or for Easter. I know I’m posting it a little late, but if I wait I’m afraid it will get lost in my sea of photos, and be totally forgotten about by next spring.
I think the cross cake turned out really well. It was for my nephew, so the only request my sister had was no pink. She has a horror story from a past cake she ordered from a grocery store bakery arriving in pink in yellow, after she requested tan. So I decided to make the cake in blue.
How To Make a Cross Cake
Materials (click item to view details):
- Wilton Cross Pan
- Wilton Leaf #67 Decorating Tip
- Wilton Decorating Tip-#21 Star
- Wilton Round #4 Round Decorating Tip
- Blossom Plunger Cutter
- Wilton Pure White Rolled Fondant
- Wilton Royal Blue Icing Colors 1 oz.
- Wilton Leaf Green Icing Color
- Wilton Sugar Pearls, White
- Wilton Fondant 9 Inch Rolling Pin
- Wilton Silver Fanci-Foil Wrap
- Wilton 12-Inch Decorating Bag
- Wilton Roll And Cut Mat
Instructions:
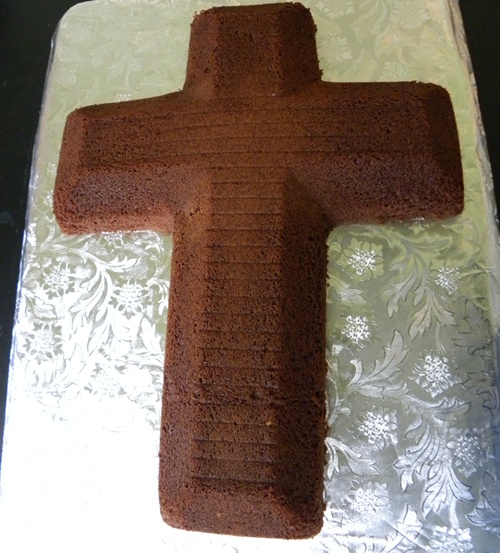
1. Bake your cake according to the recipe or mix directions. The Wilton cross cake pan fits one cake mix perfectly. Spray the pan with no stick cooking spray with flour, and pour in the batter.
2. Once the cake is baked, remove it carefully from the pan by flipping it onto a cooling rack. Place the rack over the pan and flip the whole thing over. Then gently lift the pan.
3. While your cake is baking and cooling color a small amount of fondant blue (about the size of a golf ball). Use a toothpick to apply a small amount of blue food color to the fondant, then work the color in by pushing, pulling and twisting the fondant until the color is all through. Keep adding blue food color and working it in until the fondant is the desired shade of blue.
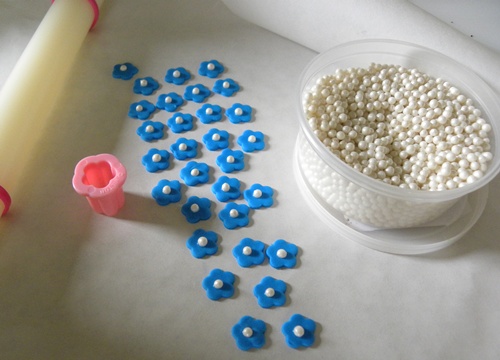
4. Use the fondant roller and a fondant mat to roll out the fondant. If the fondant is sticking use a small amount of vegetable oil on the mat or the roller. Use the guides on your roller to set the thickness. For these tiny flowers I usually use the thinnest guide.
5. Using a small blossom fondant cutter cut out about 30 flowers. Use a tiny bit of vanilla in the middle of the flower to secure a sugar pearl for your flower center. You can apply the vanilla with a small paint brush (used only for food), or with the end of a toothpick. Clear vanilla works best. Place one sugar pearl on each flower.
6.Measure and cut a sheet of cardboard to fit the cake, or use the back of a large baking sheet, and cover it with cake foil.
7. Use a bread knife or a cake leveler to cut the top of the cake off so it is level, then carefully flip the cake onto the covered cardboard.
8. Set the flowers aside to dry while you ice your cake using your favorite decorator icing. Here’s my favorite recipe: Butter Cream Icing.
9. Reserve a small amount of icing in a bowl. Add royal blue food coloring to the rest of the icing until it is the desired shade of blue.
10. Color the reserved icing with green food coloring for the vines and leaves.
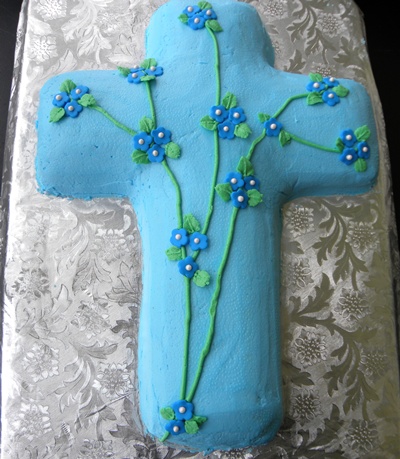
11. Ice your cake with the blue icing. I usually apply a thin layer of icing first, to seal in the crumbs. Then I apply a second layer of icing.
12. Once the cake is iced use the #4 round decorating tip and the green icing in a decorator bag to make vines on your cake. Start at the base of the cross and go up.
13. Next add your flowers to the ends of the vines, or where vines intersect. Place 2 or 3 flowers at each spot.
14. Use the #67 leaf tip on a decorator bag filled with green icing to make small leaves coming out from under each of the flowers. Apply a small amount of pressure to the decorator bag, then pull forward and release the pressure. Don’t worry if each leaf isn’t perfect.
15. Use the Wilton #21 star tip and a decorator bag to make a shell border around the base of the cake. You can color some icing a little darker blue, if you’d like the border to be darker than your cake. Make the shell border by applying pressure to the decorator bag while you have the tip down next to the base of the cake. Let the icing build up a little, then pull the tip up and forward. If you’ve never made a border before you may want to practice on a small piece of foil until you get the hang of it.
Like I said above this cake would be wonderful for a First Communion, Baptism, or for an Easter brunch.


8 comments
That looks great – you did a wonderful job and I bet she loved the BLUE – lol
You did a beautiful job, Linette!
Thank you for the step-by-step and photos.
[…] has step by step instructions and photos for making a cross cake for a First Communion, Easter, or […]
That turned out just lovely!
Fondant is a miracle material, isn’t it? This turned out so well!
[…] Cross Cake Step by step instructions and photos for making a cross cake for a First Communion, Easter, or Baptism. make-a-cross-cake-instructions-and-photos/ […]
[…] by step instructions and photos for making a cross cake for a First Communion, Easter, or […]
Wow, that cake looks great, especially on the stand you have. It actually looks like a cloth cross! Very cool idea, especially for a first communion or for Easter.