

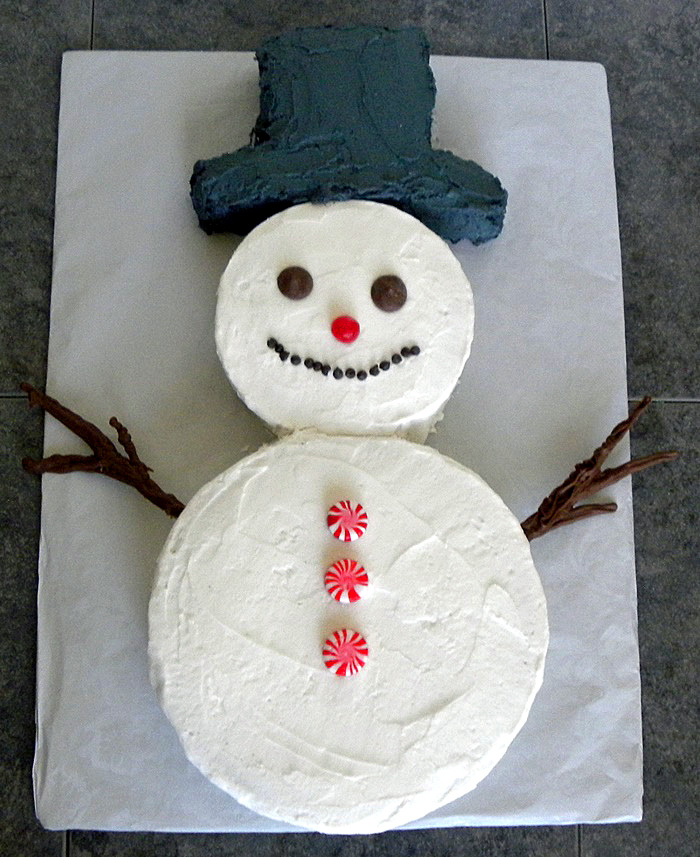
This easy cake is perfect for holiday or winter parties. The kids will love watching their snowman cake come to life when they help add the finishing touches.
A snowman cake can be the perfect treat after building the real thing in the back yard, when you’re snowed in for the day, or following a winter skating party with friends.
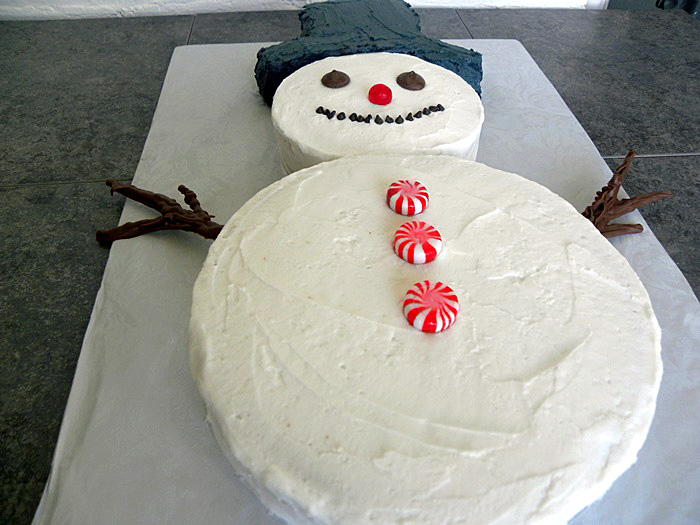
How To Make a Snowman Cake
Materials:
- 8 inch round cake pan
- 6 inch round cake pan
- 8 inch square cake pan
- 2 cake mixes
- 4 cups white icing
- Black food color
- About 16 mini chocolate chips (or about 10 regular chocolate chips)
- 3 pinwheel mint candies
- 1 red sour cherry candy
- 1/3 cup chocolate melts (reserve 2 for the snowman’s eyes)
- Pastry bag or plastic bag with a hole in the corner
- 2 toothpicks
- Wax paper
- Snowman arm pattern
- 15 inch by 20 inch Cake board
- Decorative foil to cover the cake board
Directions:
1. Mix up the cake according to the directions or recipe.
2. Spray the cake pans with a cooking spray with flour, or sprinkle the pan lightly with flour after spraying with cooking spray. Divide the cake between the 3 pans, so each is about 1/3 full.
3. Bake the cakes according to the directions.
4. When the cakes are finished baking turn them out onto a cooling rack to cool completely.
5. While the cakes are baking and cooling melt the chocolates according to the package directions. Leave two pieces of chocolate un-melted for the snowman’s eyes.
6. Once the chocolate is melted place it in the pastry bag, or a plastic bag with a hole in the corner.
7. Print the pattern for the twig arms. Put the printed snowman arm pattern under a sheet of wax paper, and pipe the chocolate onto the wax paper to fill in the lines of the arms.
8. Once you’ve finished filling in the pattern with chocolate, insert a toothpick into the end of each arm while the chocolate is still melted.
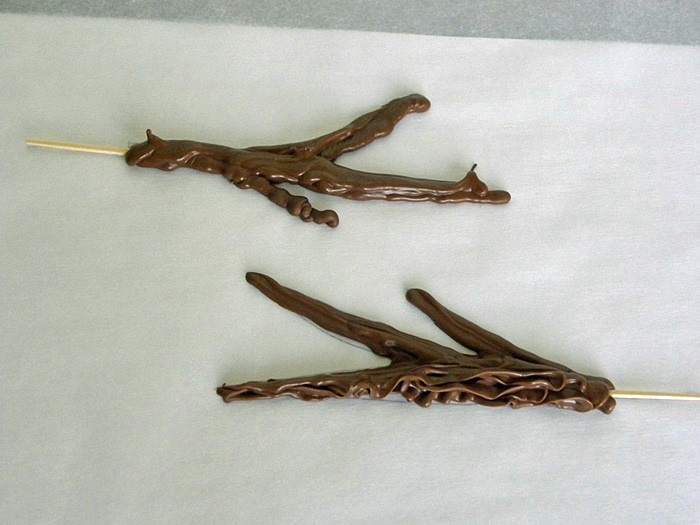
9. Set the chocolate twig arms aside to cool and harden.
10. Cover the cake board with decorative foil.
11. Once the cake has cooled completely use a serrated knife to level the tops of all three cakes.
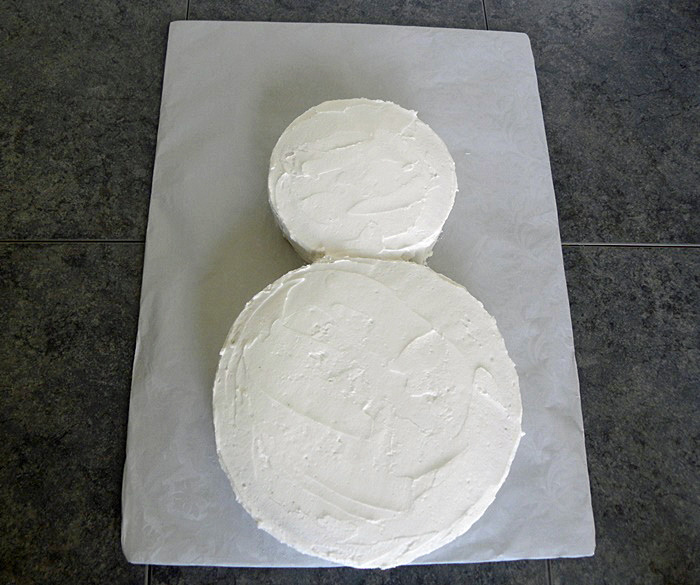
12. Place the largest round cake about an inch from the bottom of the cake board for the snowman’s body, put a little icing under the cake to help hold it in place while you’re icing and decorating.
13. Place the small round cake just above the first cake for the snowman’s head. You can also put a little icing on the bottom of this cake to hold it in place.
14. Ice the two cakes with a thin layer of white icing to seal in the crumbs and set it aside to let the icing dry for about 15 minutes.
15. Ice the round cakes with a second, thicker layer of white icing.
16. Cut a 2 inch wide strip of cake from the square cake, and place it above the small circle cake for the hat brim.
17. Cut another smaller 4 inch by 4 inch square of cake for the top of the hat and place it above the brim.
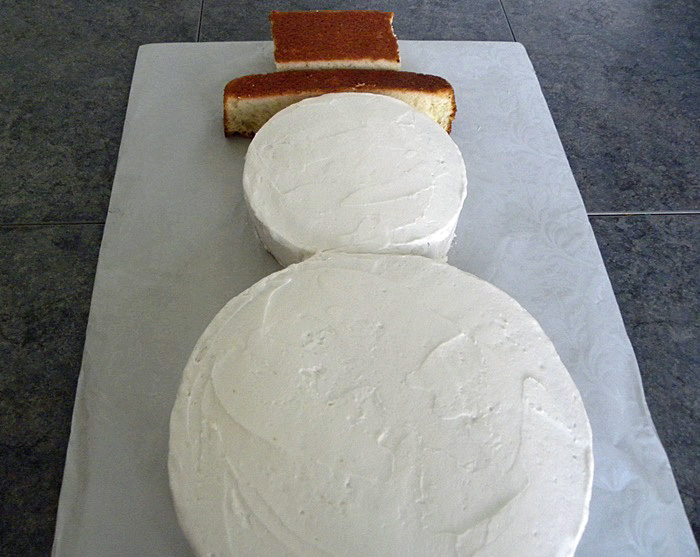
18. Color about 1 cup of icing with the black food color. Use the black icing to ice the hat.
19. Let the kids help you put the two chocolate melts in place for eyes, the sour cherry candy for a nose, line the mini chocolate chips up for the mouth, and the mint pinwheels for buttons.

20. Insert the toothpick end of the twig arms into the sides of the snowman’s body.
Kid’s Fun Tip:
You don’t have to use the candy listed here, use whatever you have on hand for the eyes, nose, mouth and buttons. Any small or medium round candies will work.
This post is part of a monthly Creative Hop. For more Christmas and winter ideas, visit a few of my favorite bloggers:
- Cranberry Stove Top Potpourri Recipe by Confessions of an Overworked Mom
- Christmas Practice Writing Sheets by A Mom’s Take
- Red Velvet Cookies with Cream Cheese Drizzle by Mom Does It All
- Christmas in a Jar by 2Boys+1Girl=OneCrazyMom
- Ornament Christmas Tree Picture by Simply Southern Mom
- Winter Wonderland Peppermint Playdough by Food Fun Family
- Easy Challah Bread Rolls from Your Bread Machine by Day By Day In Our World
- DIY Christmas Mouse Ornaments by Blessed Elements
- Homemade Cinnamon Snowflake Ornament by MommaDJane
- Graham Cracker Reindeer by This Mama Loves
- DIY Glittered Christmas Ornaments by How Was Your Day?
- Peppermint Bath Salts by Style on Main
- DIY Advent Calendar by Upstate Ramblings
- Cream Cheese Biscuit Puffs by Jennifer Sikora
2 comments
That is so cute! I love how you did the arms!
Awww, this is so cute! Not only does it look delicious, I bet my daughter would have a ton of fun helping me make it.