I saw an adorable cupcake pick with a bunny sticking up out of an Easter egg, and I decided it would make a wonderful Easter cake idea. Since the cupcake pick was not done in cake and icing, I had to work out a few details so I grabbed my sketch pad and a pencil.
While I was sketching I worked out many of the details for the cake below. I decided coconut would make wonderful fur for the bunny, and the egg part of the cake could be made from butter cream icing with a colorful polka dot pattern.
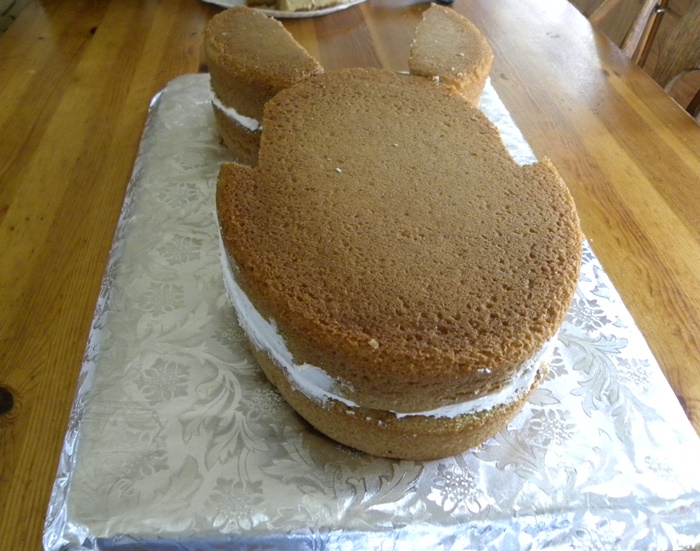
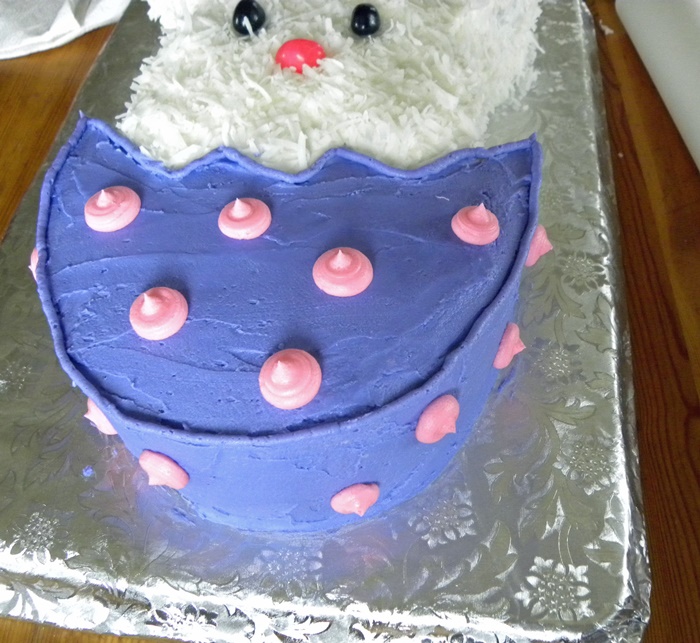
The bunny and egg were cut from one oval shaped cake, one more smaller oval shaped cake cut in half made the bunny ears. Here’s how it turned out!
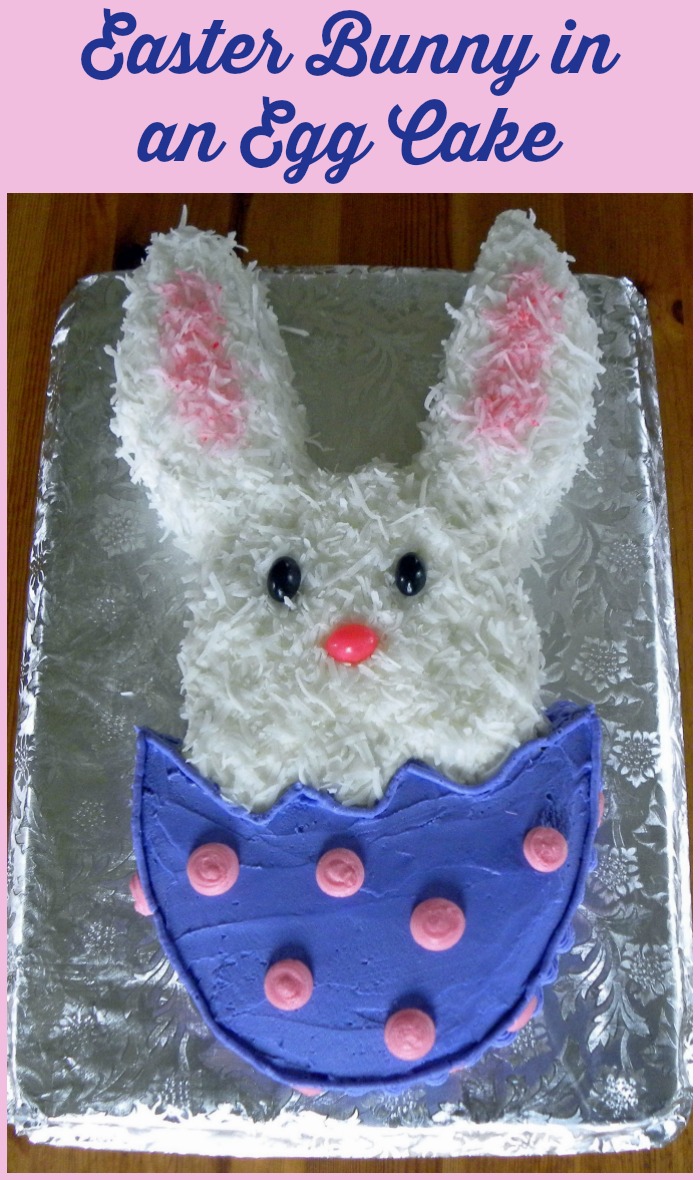
Check out the full Easter Bunny in an egg cake how to and recipe below.
Easter Bunny In An Egg Cake
Ingredients:
2 cake mixes, or your favorite cake recipe
Your favorite decorator icing in white (enough to ice 2 cakes)
2 oval pans on a little smaller than the other (I used a 7.75 x 5.5 inch pan and a 10.75 x 7.8 inch pan)
Shredded coconut
Food color
Jelly beans 2 black or blue, 1 pink
Instructions:
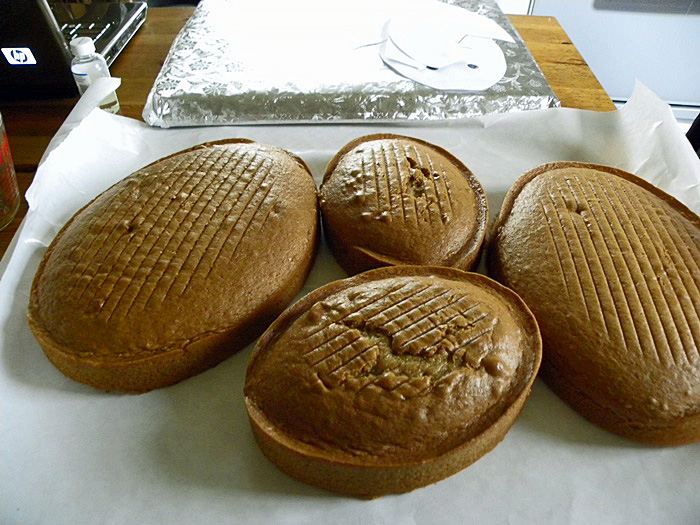
1. Bake the cakes in the oval pans according to the package or recipe directions. Each mix will make one small and one large cake if you use the pan sizes above. You can put the two cake pans into the oven at the same time. Make the bunny and egg cake a double layer cake by baking two of each size cake, for four cakes total.
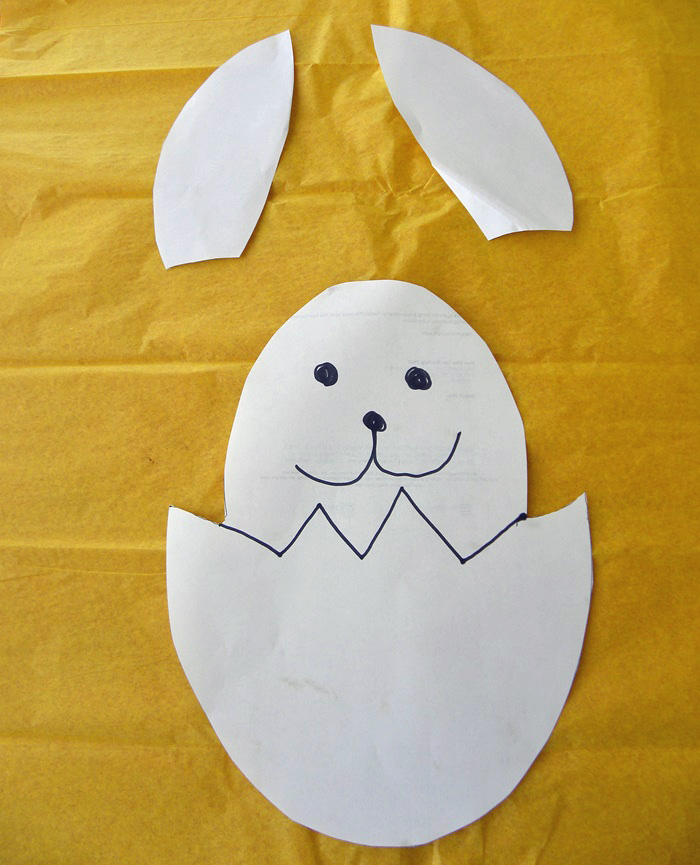
2. Trace around the bottom of the cake pans onto parchment paper, or a scrap piece of sketch paper to make your bunny and egg cake pattern. Trace halfway around the larger cake pan to make the bottom of the egg, trace the other half around the smaller cake pan to make the (top) bunny. Draw in the details of the egg shell and the bunnies face, and cut out the shape and set it aside to use as your pattern.
3. To make the ears trace around the smaller oval pan, and cut it out. Cut the oval in half down the center and trim the halves up to make the ears. Lay the pattern aside until you’re ready to use it.
4. Level off the tops of all your cakes with a serrated knife, or a cake leveler, so all the cakes are about the same height and level.
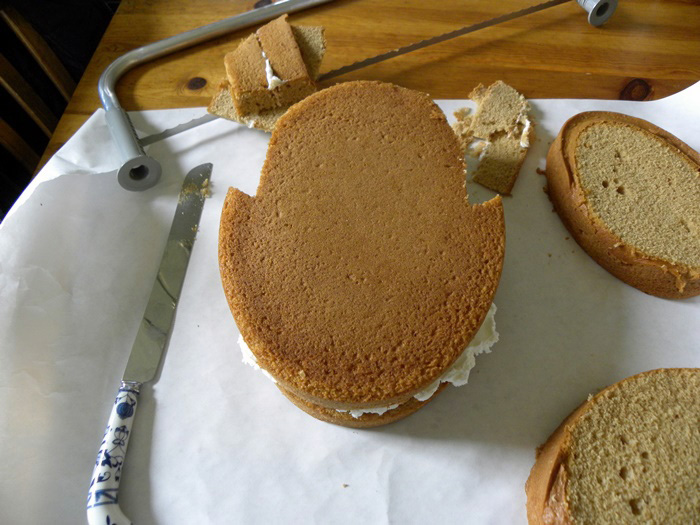
5. Ice the top of one of the large cakes, and place the second large cake on top to make a double layer cake.
6. Use the pattern you made to cut the cake to shape of the bunny out of the cake with a serrated knife.
7. Repeat the process with the small cakes. Ice the top of one of the cakes, and place the other cake on top to make a double layer.
8. Cut the small oval cake vertically down the center, lay the ear patterns over the two halves of the cake, and cut out the ears.
9. Cover a large piece of cardboard or the back of a large cookie sheet with foil to make a base for the cake.
10. Put a spoonful of icing on the covered board, and spread it out before you put the cake on, to hold the cake in place.
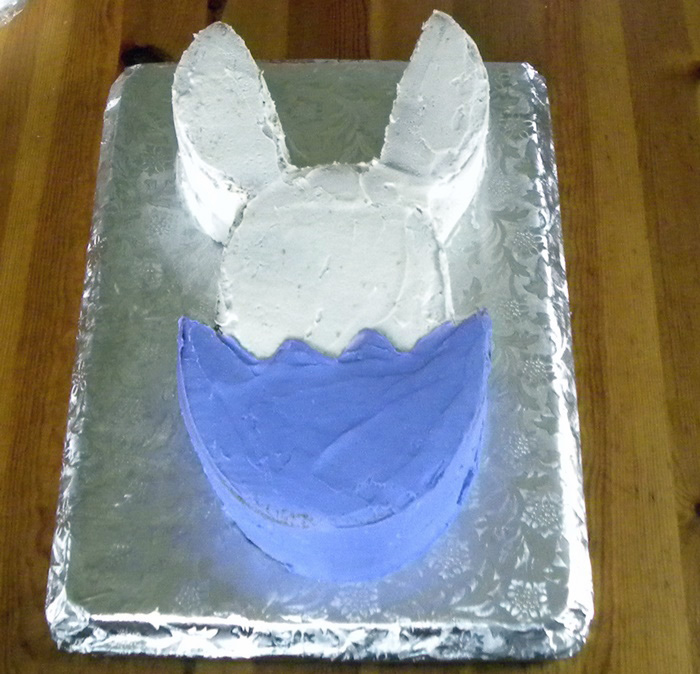
11. Very carefully place the bunny cake on the board, and carefully put the ears in place. Put a thin layer of icing between the bunny ears and the bunny to hold the ears in place.
12. Use a toothpick to sketch out the shell of the egg, where you want the bunny’s eyes, and nose.
13. Ice the whole cake with a light layer of icing to seal in all the crumbs.
14. Add another layer of white icing to the bunny portion of the cake, and sprinkle it lightly with shredded coconut for the bunny’s fur.
15. To make the pink center for the bunny ears, color some coconut pink with a little pink food coloring. Mix a tiny bit of the food color into some of the shredded coconut with a fork, and sprinkle the colored coconut into the center of the ear.
16. Place jellybeans on the bunnies face for the eyes and the nose. Use two black jelly beans for the eyes, and one pink for the nose.
17. Apply a second layer of icing to the egg part of the cake in the color of your choice. Use a small round decorator tip and a cake decorating bag to outline the top of the egg all the way around (I used a Wilton number 7 decorator tip).
18. Make a shell border around the bottom of the egg with a star tip (I used a Wilton number 21 decorator tip) and a decorator bag. Squeeze icing through the tip then lift up and forward to form each shell all the way around the base of the egg portion of the cake.
19. Color some of the icing pink. Use a larger round decorator tip (I used a Wilton number 12 decorator tip) to make the polka dots on the egg. Hold the decorator tip right above the cake and squeeze the icing out through the tip until the dot is about 1/2 “ wide. Repeat the process several times to make a polka dotted egg shell.
20. Once the polka dots have dried use your fingers and a small piece of waxed paper and gently pat the tips of the dots down flat.
The finished cake will make a nice display for your Easter brunch.
Kid’s Fun Tip:
As a finishing touch you can roll out some fondant, and cut it into strips to make a bow for the bunny’s ear.
Black string licorice can be added for whiskers.
For more creative Easter and spring ideas, visit a few of my favorite bloggers:
- How to Dye Your Easter Eggs with Natural Dyes by Confessions of an Overworked Mom
- How to Marble Easter Eggs With This Nail Polish Hack by The Socialite’s Closet
- How to Make a Really Cute Flower Wall Clock by How Was Your Day?
- Easter Coloring and Puzzle Fun for Kids by Day by Day in Our World
- Washcloth Bunny Easter Egg Holder by Mom on the Side
- Rice Krispie Easter Egg Bites by Mom Does it All
- Easter Chick Craft for Kids by Sincerely Mindy
- Chocolate Chip Cookie Dough Eggs by Sugar, Spice and Family Life
- Choco Peanut Butter Easter Cookies by Mommy Snippets
- Rustic Easter Wreath by sweet lil you
- Make Your Own Spring Sunshine Essential Oil Perfume by Style on Main
- Italian Easter Meat Pie by Upstate Ramblings
- Jellybean Bark by Savvy Saving Couple




3 comments
That is adorable! I love the little jellybean nose. Super cute!
Oh my goodness! That might just be the cutest cake ever! Love it!
I love this!!! Super cute!