I can’t believe it’s already mid January, and Valentine’s Day is only a month away! I’m just starting to recover from the holidays, hah! Now I need to start thinking about Valentine’s Day!
Basket weave is one of my favorite ways to decorate a cake, and we all know one of the hottest gifts for Valentine’s Day is chocolates, so I thought I’d combine the 2 and make a box of chocolates cake.
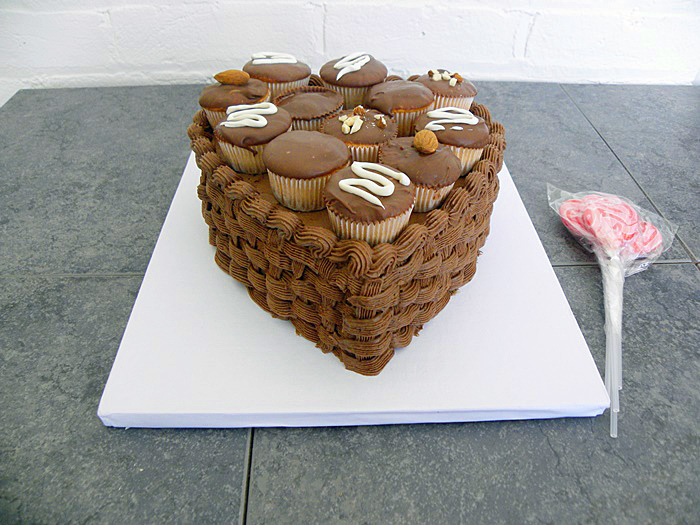
My box of chocolates cake turned out better than expected so I’m sharing the how to here so you can show someone how sweet you are on them this Valentine’s Day with a Box of Chocolates Cake yourself. I used mini cupcakes as a fun substitute for the chocolates.
This cake is not difficult to make and you can make it with one cake mix. If the basket weave scares you, simply ice the sides of the cake and add a decorative border at the top and bottom. Really though, give the basket weave a try before you say you can’t do it. the pattern looks more difficult than it is to create I promise!
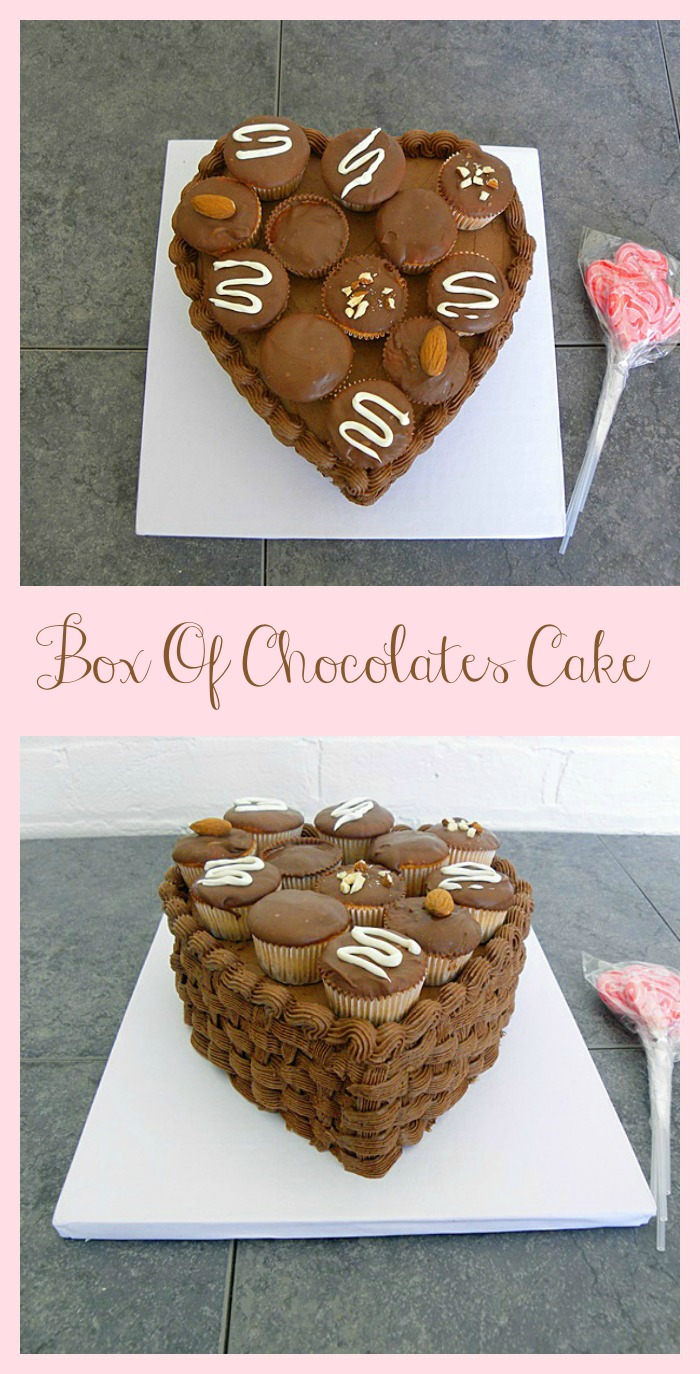
If you scroll to the bottom when you’re finished I have more fun Valentine’s Day ideas to share from some of my favorite bloggers! But first step by step instructions so you can create your own box of Chocolates cake this Valentine’s day.
Box of Chocolates Cake How To
Materials:
- Cake mix (1 to 1 ½)
- 3-4 Cups chocolate icing
- 9-10 inch cake board or plate
- Decorative foil
- 8 Inch heart shaped baking pan (or round cake pan)
- Mini muffin pan
- Mini muffin wrappers
- ½ Cup melting chocolate
- 1-2 Pastry bags
- Basket weave tip (like Wilton #47)
- Star tip (like Wilton # 32)
- Optional: nuts
- Optional: a little white chocolate for drizzling
Instructions:
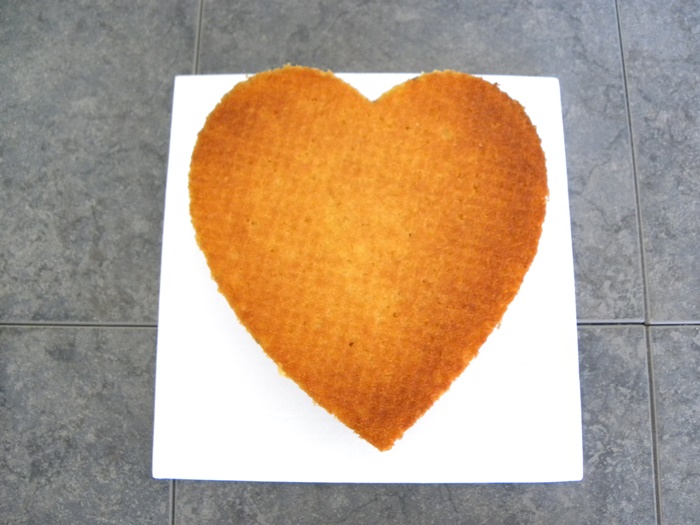
1. Bake the cake and the mini muffins according to package directions, 1 cake mix should make one 8” heart cake and at least 12 mini cupcakes. If you use a larger heart pan you may need 1 ½ cake mixes. If your mix doesn’t have directions for the mini muffins, bake them for about 12 to 15 minutes, and check for doneness.
2. Set the cake and the mini cupcakes aside to cool.
3. Melt the chocolate according to the package directions.
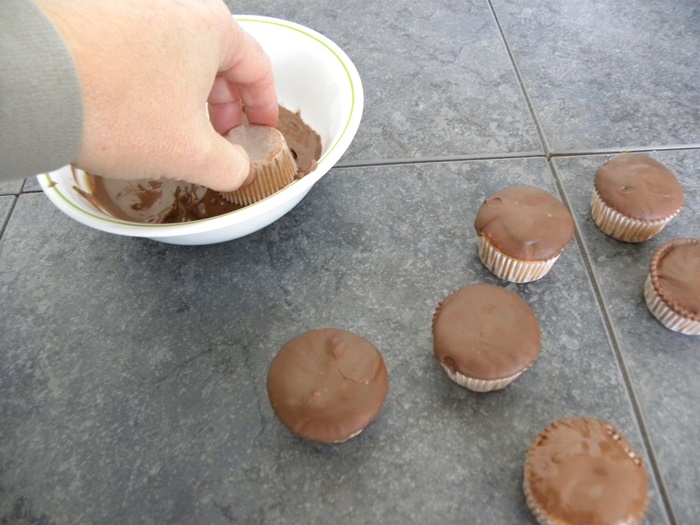
4. Let your kids help dip the tops of the mini cupcakes into the chocolate, and set them aside to cool and harden. If you’re adding nuts to the tops of some of the cupcake “chocolates” go ahead and add them while the chocolate is still melted.
5. You can also drizzle the top of a couple of the “chocolates” with white or dark chocolate using a spoon or pastry bag and some white chocolate melted according to the package directions.
6. Level the cake with a serrated knife and place it on a 9 to 10 inch cake board covered with decorative foil.
7. Ice the cake with chocolate icing.
8. Set the cake aside to let the icing dry for about 15 minutes.
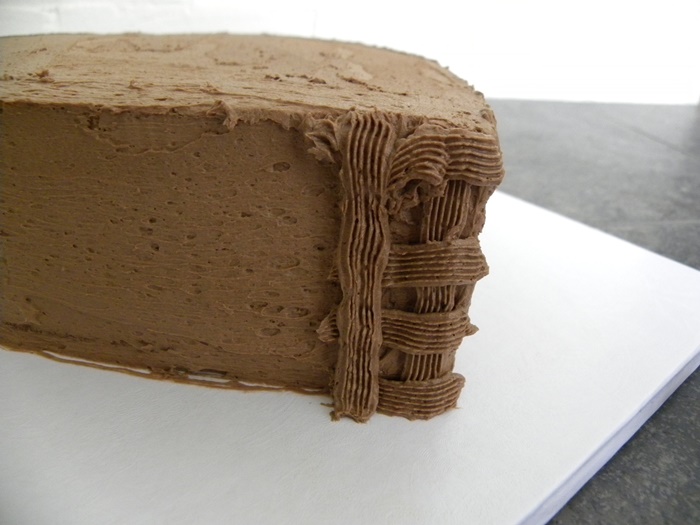
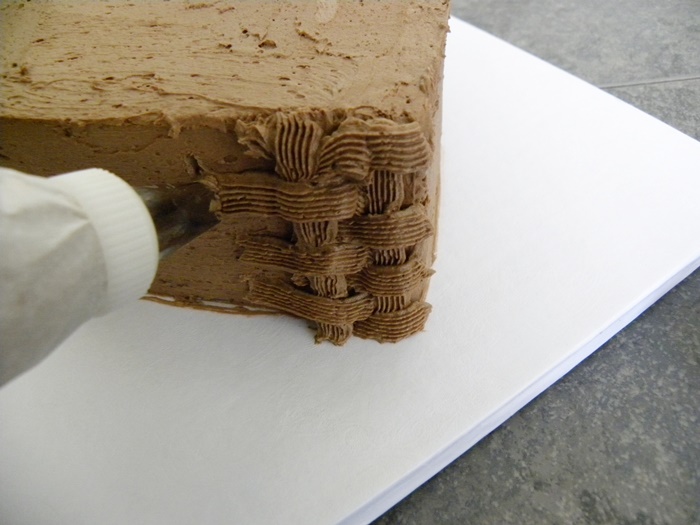
9. When the icing is dry, you’re ready to make the basket weave. Fill a pastry bag with chocolate icing and use the basket weave (like Wilton #47 tip) decorator tip. Start decorating by putting one strip down the side of the cake. You can use a star tip or a flat sided tip for your weave. Different tips will give your weave a different look, but many will work.
10. Once you have one vertical stripe down the side, pipe several short horizontal lines going across the vertical stripe and continuing on for about an inch on the other side. Leave room between each horizontal stripe about the width of the decorator tip so you can insert a row between later (see photo).
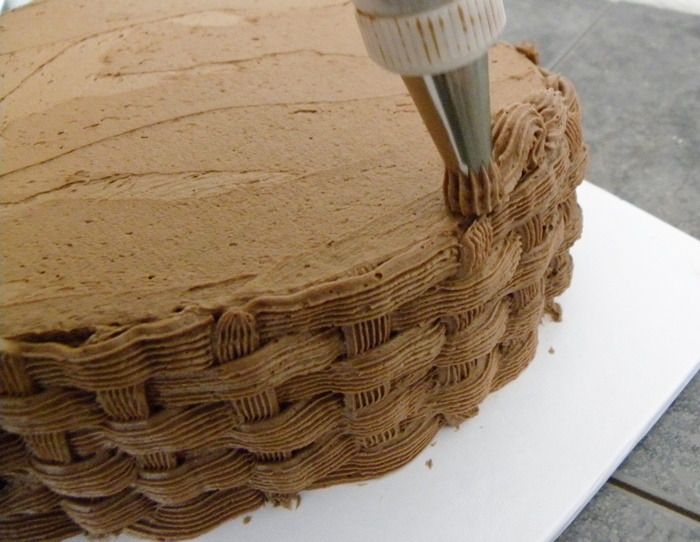
11. Make another vertical stripe down the cake going just over the ends of the horizontal stripes you just made. Repeat the horizontal stripes, but bury the beginning of the next set of horizontal lines under the first vertical line, in the spaces you left between your first set of horizontal lines, so it looks like the weave is coming out from underneath.
12. Repeat the process all the way around the side of the cake.
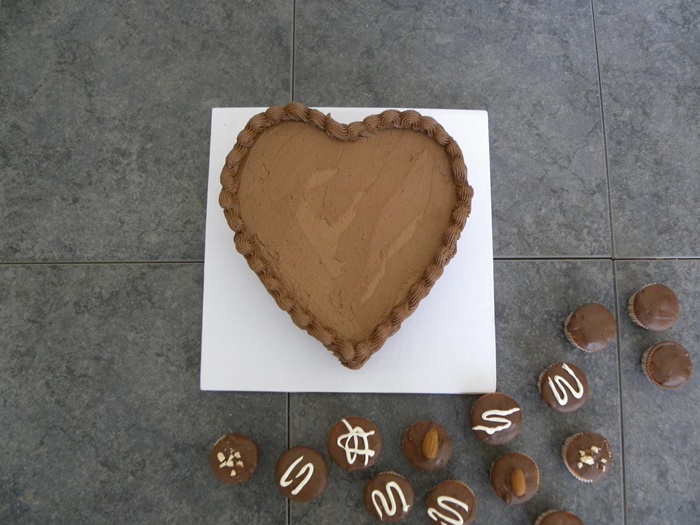
13. You can finish the cake off with a border around the top and/or bottom of the cake. To make the shell border pictured here use a star decorating tip with a decorator bag. Place the tip just above the cake where you want to make your first shell. Squeeze your hand to apply pressure and squeeze out some of the icing while you lift slowly and pull slightly forward, release the pressure and lift up. Put the tip right above the end of the first shell and repeat the process. Repeat this motion all the way around the cake to make a shell border.
14. Place your mini cupcake “chocolates” on top of the cake.
Kid’s Fun Tip:
If you don’t want to make the mini cupcakes, you can purchase a box of chocolates to add to the top of your cake.
For more Valentine’s Day ideas, visit a few of my favorite bloggers:
- How to Make Rose Water by Confessions of an Overworked Mom
- A Valentine’s Day Breakfast by The Guavalicious Life
- Salted Caramels by How Was Your Day?
- Valentine’s Day Krispies Treats by This Mama Loves
- Homemade Strawberry Syrup for Flavorful Delights by Day by Day in Our World
- Pom Pom Valentine’s Day Craft for Kids by Our Family World
- French Vanilla Raspberry Italian Cream Soda by Pretty Opinionated
- Epsom Salts DIY Valentine’s Candles by A Day in Motherhood
- Chocolate Honey Lip Scrub by The Socialite’s Closet
- Hugs and Kisses Valentine’s Cupcakes by Simply Southern Mom
- Printable Valentine’s Day Scavenger Hunt by Mom on the Side
- Cranberry Hootycreek – Valentine’s Day Cookies by MommaDJane
- Dark Chocolate Cranberry Granola by Food Fun Family
- Valentine’s Day “Love Lives Here” Decorative House Craft by Sincerely Mindy
- Hand Sewn Valentine Cards by Beyond Mommying
- No Bake Choco-Date Cookies for Valentine’s Day by Mommy Snippets
- DIY Heart Stamp for Kids by Family Focus Blog
- DIY Peppermint Chocolate Bark Favors by A Bride on a Budget
- Day Out With Daddy Jar by Sweet Lil You
- No Sew Fringed Scarf for Him – or Her! by Style on Main
- Strawberry Shortcake in a Jar by 2Boys+1Girl=OneCrazyMom
- Valentine’s Day Oreo Hearts by Gator Mommy Reviews


1 comment
Wow that is gorgeous. It looks like it took forever!