

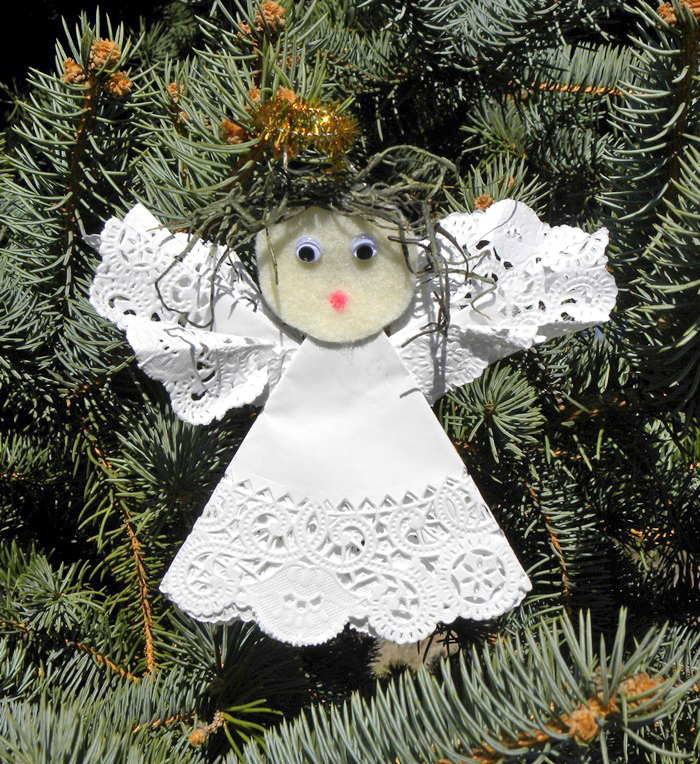
One of my favorite holiday traditions is making a handmade ornament each year with the kids. I did it with my mom when I was growing up, now I create a new ornament with my children each year to keep the tradition going. This paper angel Christmas ornament is sure to be a favorite to make and give. The ornaments on our tree can be traced back to the year and the person who made it. We also make some wonderful memories gathered around the table working on our ornaments every year.
This paper angel Christmas ornament is very easy to make for little hands with a little help and supervision from an older brother or sister, or an adult. It only requires a little cutting, gluing and some folding to create a fun keepsake ornament for your Christmas tree.
Materials:
- 1- 6 inch paper doilies
- 1- 8 inch paper doily
- 1 piece cream felt
- 2 inch piece of string
- 1 Gold pipe cleaner
- Glue
- Wiggly eyes (optional)
- Pink marker (optional)
- Pinch of sphagnum moss (optional)
Paper Angel Christmas Ornament Instructions:
1. To make the angel’s wings cut the 6 inch doily in half, then start at one end and fold one corner back about ½ inch, fold back and forth with the straight edge on one side, and the curved edge on the other side, until the whole thing looks like an accordion (see photo), repeat the process with the other doily half to make the other wing.
2. Glue each side of each fold, on the cut (straight) edge, so one end is completely glued to hold the folds together (see photo). You can hold everything in place with a paper clip and set the wings aside until the glue has a chance to dry.
3. To make the angel’s body fold the 8 inch doily in half, and fold it in half again, so it is folded into ¼. Fold the doily back one more time, but only fold over about an inch (see photo).
4. Cut 2 circles about 1 ½ inches in diameter from the cream felt, use a bottle cap, a small glass, or the bottom of your glue bottle for a pattern.
5. Cut a 2 inch piece from the gold pipe cleaner. Bend the top half of the pipe cleaner around to make a circle for the angel’s halo. Leave the bottom half straight to attach the halo to the angel.
6. Lay one felt circle flat on the table. Squeeze glue on the top side of the circle.
7. Lay the string on the top of the felt circle so the two ends are in the glue, and the string makes a loop above the angels head to hang it on the tree.

8. Lay the straight end of the halo on the felt circle. Place it just inside the loop you made with the string, so the halo will be right above the head, and the bottom part of the pipe cleaner is in the glue to hold it in place.
9. Place the pointed side of the folded large (8 inch) doily on the felt circle, so the point is going up, and the rest of the angel’s body is below the circle.
10. Add glue to one side of the second felt circle, then place it over the first circle, glue side down, with the string, halo, and tip of the body sandwiched in between the two felt circles. Set the whole thing aside to dry for a few minutes.
11. Give each angel wing a slight twist on the side you glued together so the wings will lay flatter when you glue them on to the body.

12. Glue the wings to the back of the angel so one wing is sticking out on each side of the body.
13. Optional: Add wiggly eyes to your angels face, or leave it blank.
14. Optional: You can also add a mouth with a pink or red marker and glue a pinch of sphagnum moss to the top of her head for hair.
14. Don’t forget to add your name and the date to the back of the angel so you can remember when you made it.
15. Hang your angel on the Christmas tree, or add it to a special gift.
Fun Tip:
Handmade ornaments make wonderful gifts for parents, grandparents, and special friends. Looking for more? Check out this handmade Christmas Santa clothespin ornament.