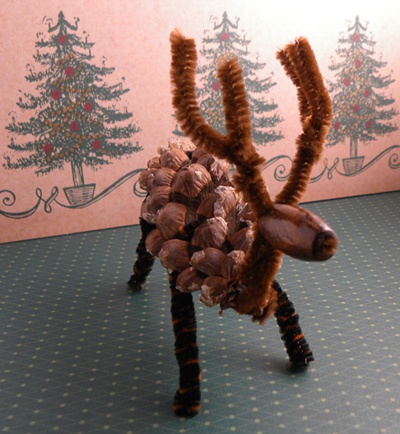
My son and I decided to make some pine cone reindeer to add to our Christmas decorations this year. They turned out really cute, and they’d be a fun craft project for a children’s Christmas party, or even place card holders for a holiday gathering.
The pine cone reindeer were super simple to make you only need a few things, and they can be assembled in minutes.
How to Make a Pine Cone Reindeer
What you’ll need:
- pine cones
- brown pipe cleaners
- a long brown bead (I found some at Joann.com
)
- A hot glue gun
I cut a pipe cleaner in half, and wrapped one half around the front of the pine cone for the front legs. I wrapped the other half around the back of the pine cone for the back legs. You can have an adult put a tiny bit of hot glue under each set of legs to hold them in place, but mine have been staying in place without any glue.
For the neck and head I folded one pipe cleaner in half and then in half again. Then I pushed the folded side through the bead so that it’s just peaking out the other side for a nose (again you can use a glue gun to hold it in place once you get it where you want it).
On the side you fed it through from you should have one folded piece of pipe cleaner, and two individual pieces of pipe cleaner sticking out. The folded piece is the neck. Fold it downward and have an adult hot glue that to the pine cone body.
The two single pieces of pine cone sticking out are the antlers, fold them up. You can add to them by cutting little bits of pipe cleaner and twisting them to the main antler wire. This will make them look fuller. You can make a 10 prong buck if you’d like.
Have fun!


3 comments
We are raking leaves and pine needles in our yard now. Can’t wait to pick up those pine cones! This would also be a good craft for our cub scout den.
Very clever! My 5 yr old and I will enjoy making these this year.
[…] DIY project and photo credit to kidsfunreviewed.com […]