I’m so excited spring is finally here in Ohio! I’m ready for warmer temperatures and sunshine! I love sun catchers to catch all that warm spring and summer sunlight! So today I have an easy little project for the kids to make! A fun butterfly sun catcher craft from a little tissue paper and a foam sheet. If you don’t have a foam sheet, you can also use construction paper or black card stock to make the butterflies outline.
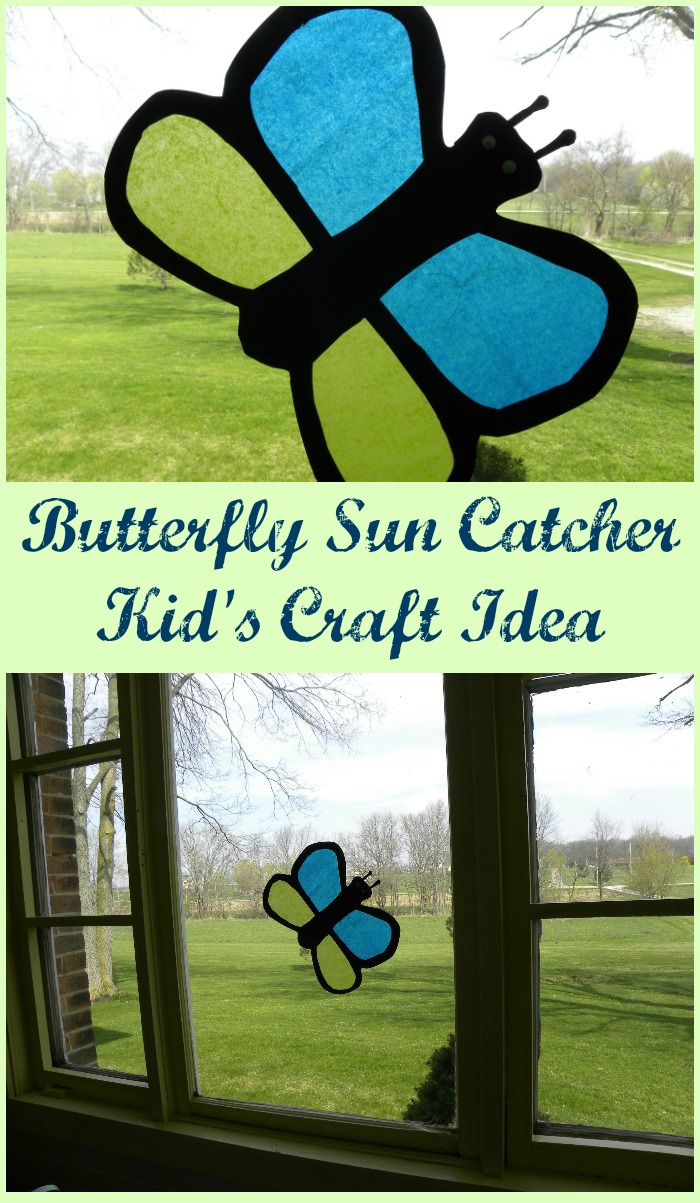
These would be a really fun and low cost craft for kids to make for a spring birthday party. Just cut the butterflies out of the foam ahead of time and let the kids cut out the tissue paper and glue them together for a quick and easy spring party craft the children can take home to hang in their own windows.
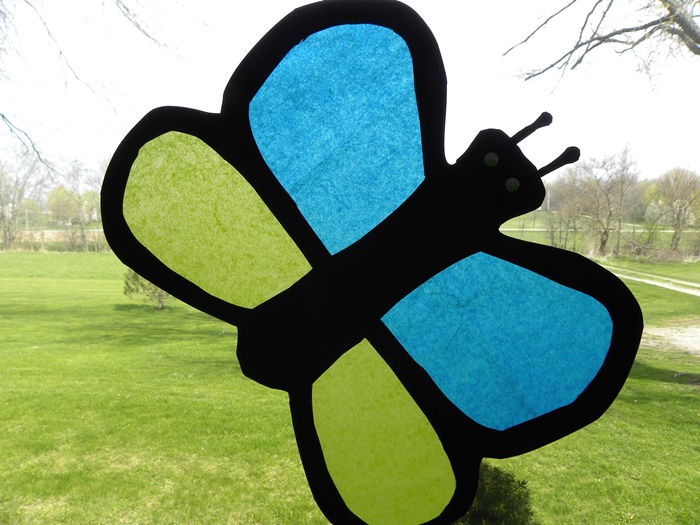
Butterfly Sun Catcher Craft
Materials:
Tissue paper
Glue
8 ½ x11 Black foam sheet or black construction paper
Googly-eyes (optional)
8 ½ x 11 White notebook paper
Pencil
Instructions:
1. Use the notebook paper to make a pattern. Fold your notebook paper in half. Draw half the butterfly with the butterfly’s body along the center fold (See photo). Then when you fold the paper out you will have a whole butterfly with both halves the same.
2. Take the butterfly’s body from the top to the bottom of the paper along the fold (so when it’s folded out the body will be twice as wide), make the wings fill the whole page all the way to the edge.
3. Once you have the butterfly drawn exactly how you want it, cut out the ½ butterfly leaving it attached at the fold, and use it for a pattern to draw the butterfly on the black foam.
4. Fold the black foam sheet in half, and lay the folded pattern on top, with the body on the same side as the fold.
5. Trace around the pattern, and cut out the butterfly. You can cut out one or cut out several for a kid’s party craft project.

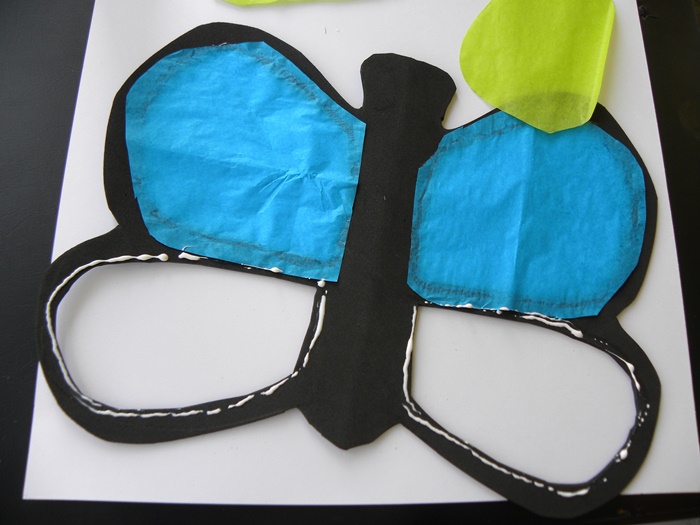
6. Once you have the outline of the butterfly cut out, make another cut about ½” in and cut all the way around the top wing, and all the way around the bottom wing while the foam is still folded in half. When you get done you should only have the outline of the wing left (see image).
7. Unfold the foam and you should have the outline of a butterfly.

8. Lay out a sheet of tissue paper in your favorite color. Lay the butterfly over the top of the tissue paper and trace lightly on the tissue paper around the inside of the wing.
9. Cut out the tissue paper a little larger than your pencil outline. Repeat the process for each wing. When you’re done you should have four wings.
10. Put a small thread of glue all the way around the back of the wing, and glue on the tissue paper. Repeat this process for all four wings.
12. You can also add googly-eyes or antennas to the butterfly.
13. Use tape to stick your butterfly sun catcher in the window, then watch the light shine through.

Kid’s Fun Tip:
If the children are older you can let them pass the butterfly pattern around and cut out their own with a little instruction from you.
Looking for more craft ideas?