

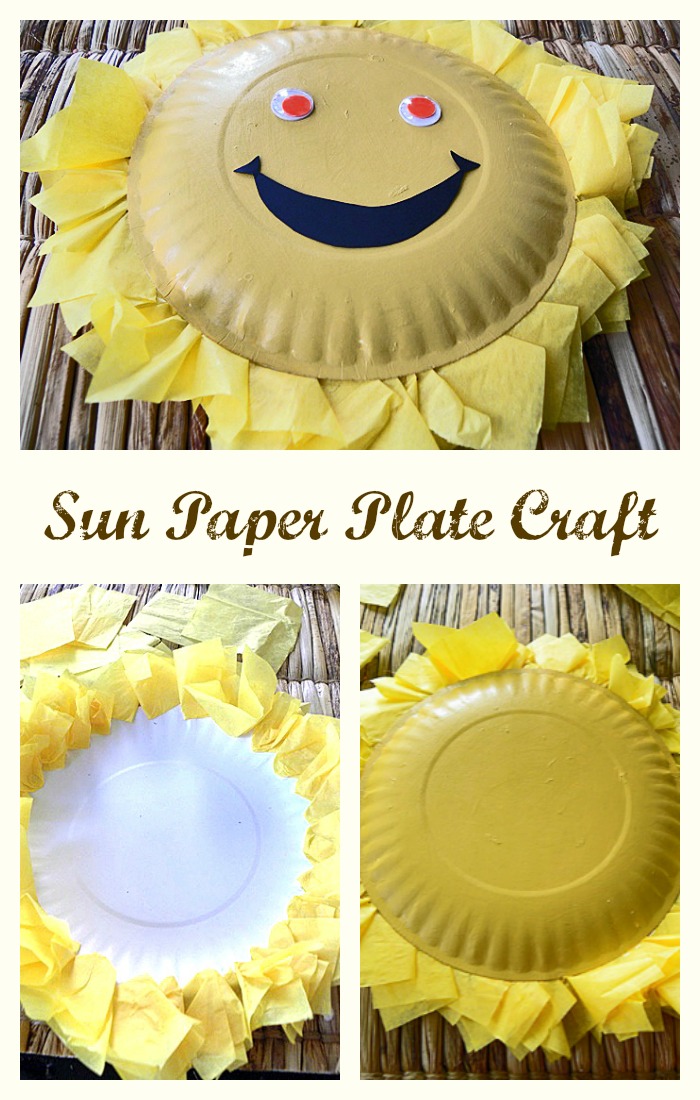
Today I have a fun sun paper plate craft idea for kids that would work equally well for an end of summer pool party, or a great rainy day project to encourage the sun to come back and shine.
If you don’t want to use paint, you can also use a marker to color the sun, or draw on the sun’s face.
Bring a little bit of the sun inside. When you’re done you’ll have a fun smiling sun you can hang anywhere to cheer on summer.
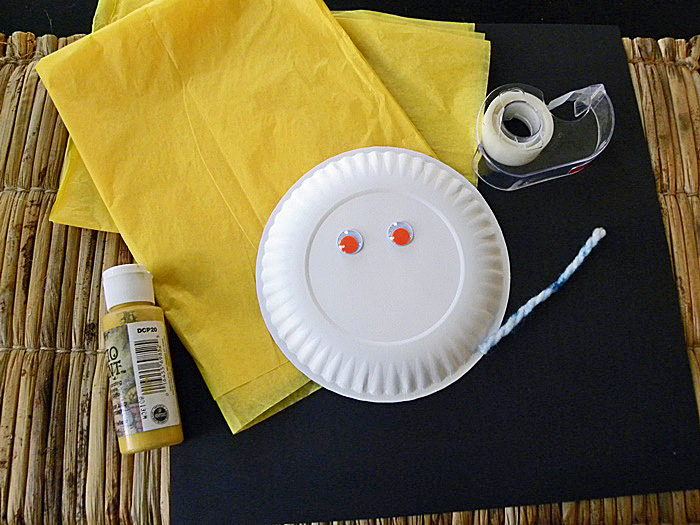
Materials:
Small paper plates
Yellow tissue paper
Yellow craft paint
Glue or tape
String or yarn
Paint Brush
Black Construction paper
Wiggly eyes
Instructions:
1. Paint the bottom of the paper plate yellow with the craft paint. You might want to cover the table with newspaper before you start.

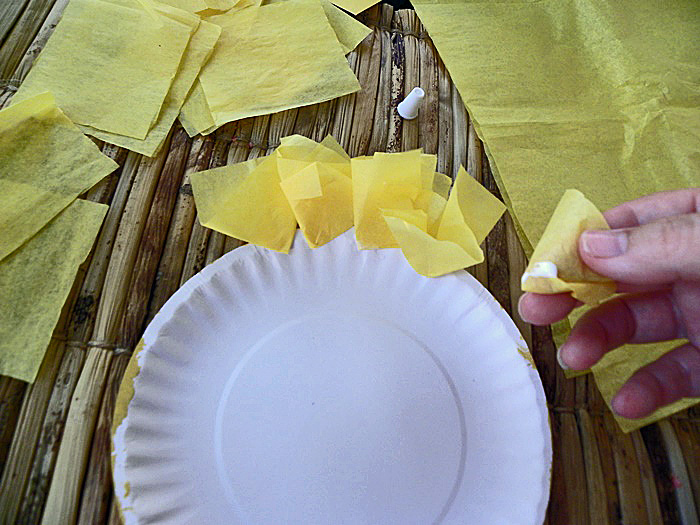
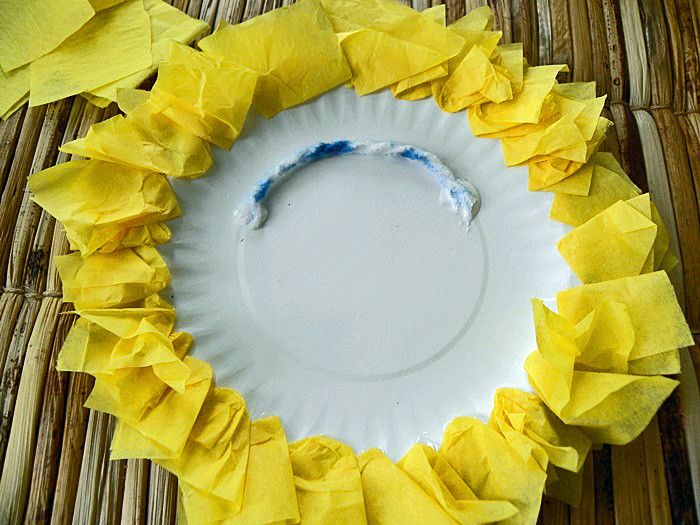
2. While you’re waiting on the paint to dry, cut out about 25 2” squares per sunshine out of yellow tissue paper. If you’re making these for a pool party, you may want to have an adult cut out the squares ahead of time. You can cut several squares at a time by stacking several pieces of tissue paper together before you cut them.
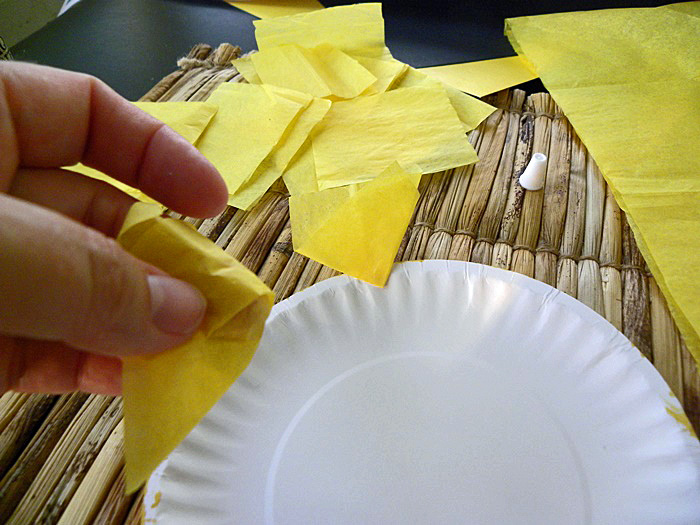
3. Once the paint is dry, poke your finger into center of the tissue square, and dip the end over your finger into a little craft glue. Turn the paper plate upside down (paint side face down) and glue the tissue squares to the outside edge of the plate (see photo). Repeat this until you have tissue paper squares all the way around the outside of the plate for the sun’s rays.
4. While the plate is upside down, glue or tape on a 2 to 3” piece of string to the top part of the plate for a hanger. Put a little glue on each end of the string, to glue it to the plate, leave the string a little loose in the middle to hang the sun when you’re finished.
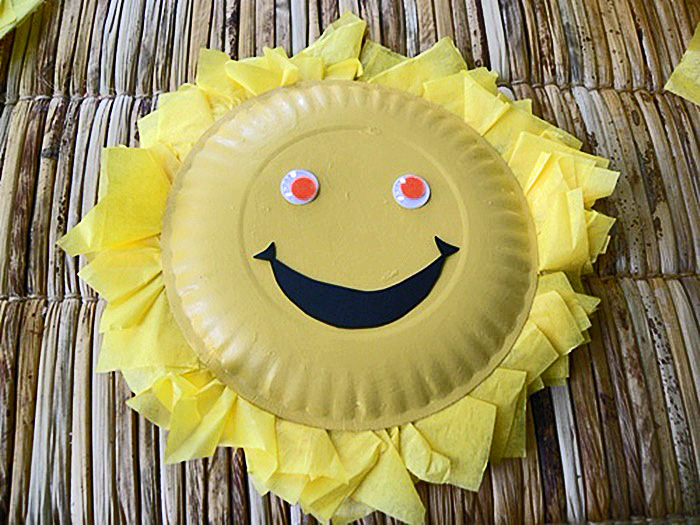
5. While you give the glue a few minutes to dry, cut out a mouth for your sun from black construction paper. To make a smiling mouth trace 1/3 of the way around a small glass, then draw in a second curving line that makes the mouth narrow at the edges and wider in the center. If you’d like you can add two small triangle shapes to each end of the smile for dimples. Cut out the mouth. If you’re making these for a party, you may want to cut out several mouths ahead of time.
6. Now you’re ready to flip your sun craft over, so the painted side is up. When you’re flipping the sun over, make sure the string hanger is across the top (on the back).

7. Glue on the wiggly eyes and the mouth.
8. Hang your craft on a wall or door using the string on the back.
Kid’s Fun Tip:
If you don’t have any wiggly eyes you can cut some out of construction paper, or cut out a pair of sunglasses from construction paper for your sun wall hanging.