Easter is one of my favorite holidays for baking and creating yummy treats. One of my favorite things to create is a bunny cupcake. I’ve created several variations through the years, and this year I decided to try using Nutter Butter cookies for the bunnies ears. They turned out really cute, so I thought I’d share. Here’s a pic, and I have directions below!
Easter Bunny Cupcakes Directions
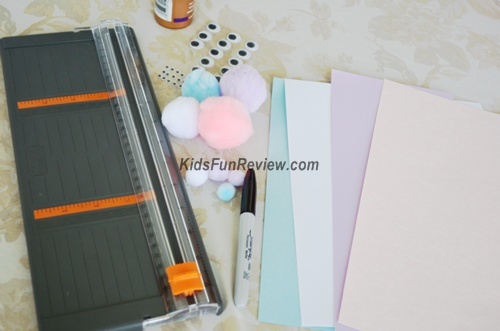
Materials:
- Your favorite cake mix or recipe baked into cupcakes
- Pastel card stock (pink, blue, yellow, white, purple, or your favorites)
- Craft pom poms (1 small for the nose and 1 larger for the tail for each cupcake)
- Black Sharpie marker
- Glue
- Wiggly Eyes (one pair for each cupcake)
- 2 Nutter Butter cookies per bunny
- Decorator icing in pastel colors to match the card stock colors
- Pink decorator icing for the inside of the ears
- 2 toothpicks per bunny
Directions:
1. Bake the cupcakes according to the recipe or mix directions, and set them aside to cool.
2. While your cupcakes are cooling cut strips of card stock 1 inch by 9 inches long. Cut one strip for each cupcake bunny you plan to make,
3. In the center of each strip place two wiggly eyes and a small pom pom for the bunny’s nose. Put the eyes toward the top of the strip, and the nose right in the center. Let your kids help and make it into an assembly line and you can have a couple dozen bunny cupcake wraps in no time!
4. Use the sharpie to draw a bunny mouth below the nose.
5. Glue the ends of the strips together to form a circle. They should overlap about an inch, but you may want to test them around the cupcakes to make sure they’ll fit. You can use a paper clip to hold the glue in place until it dries.
6. Glue a larger pom pom to the back of the wrap, next to the seam. Then let the wraps dry for a few minutes.
7. While the glue is drying on the bunny wraps ice the cooled cupcakes in pastel colors or white to match or contrast with your wrap colors.
8. Also ice one side of the Nutter Butters, and use a knife or decorating spatula to add a pink center to the icing for the bunnies ears.
9. Insert a toothpick into the bottom of the Nutter Butter. (NOTE: Just make sure you remove the toothpick before you let the kids eat the cupcakes!)
10. Carefully drop a cupcake in the center of each wrap, then insert the toothpick end of the Nutter Butter into the top of the cupcakes. Your finished cupcake should look something like this.
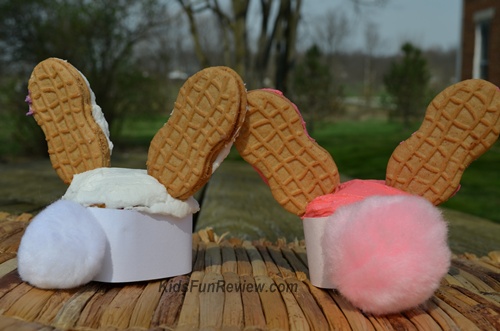
Here they are from the back.
I didn’t ice the backs of the Nutter Butters, but you could! Or you could dip them in chocolate instead of icing them, and just ice the pink centers of the ears. Like I said, I’ve come up with several variations on my bunny cupcakes through the years, so feel free to experiment!


11 comments
Two things… I just ate breakfast but I am hungry again. And two now I want Easter to hurry up and get here. These are adorable and oh-so doable! Love the idea. – Katy
Thanks Katy! I’m always excited for Easter to get here too!
My sons love Nutter-Butters! Guess what we will be making for Easter?? Thanks for the tutorial.
My son loves Nutter Butters too! The ears were missing off all my bunnies shortly after I was done taking the pictures:-)
What a cute idea! I love it!
Thanks Melissa!
Aw, how cute!
Aww … those are so sweet! I’m sure the kids will love ’em. I mean kids of all ages 😉
These are so cute.
I love your Easter bunny cupcake idea! How very clever you are.
[…] Bunny Cupcake Wrap from here at Kid’s Fun Review for those of you who want to add a little craftiness to your […]