I have a Cricut cutting machine, and I love it! I use it for scrapbooking, but I also use it for many other DIY projects, that’s why I had to share these fun ideas for a DIY kid’s Halloween party treat table. Check it out!
I want to share a few of my favorites here.
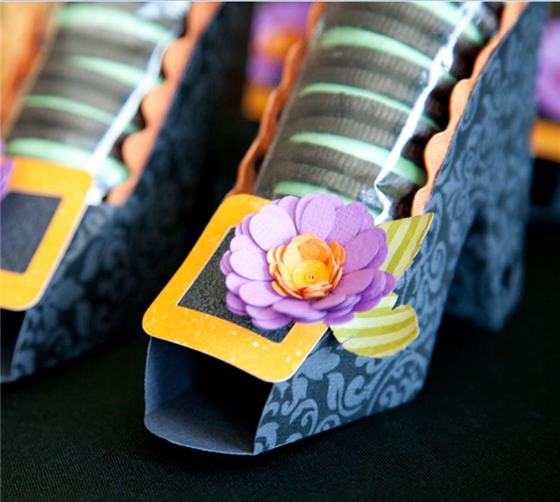
Witch’s Shoe Party Favor
Materials:
- Ribbon
- Orange speckle pattern paper (1)
- Cellophane bags
- Green stripe pattern paper (1)
- Cookies
- Dark gray cardstock (2)
- Ink
- Golden yellow cardstock (1)
- Hot Glue Gun
- Orange cardstock (1)
- Adhesive
- Purple cardstock (1)
You’ll also need:
- Cricut Fabulous Finds Cartridge
- Cuttlebug Daisy Quilling Kit
- Cricut Imagine Machine
- Witches Shoe Cut File
Step 1:
Cricut® Cuts:
Princess Party Cartridge
1. Shoe
a. Dark gray shoe (7 ½” )
Fabulous Finds Cartridge
2. Buckle
a. Dark gray base (1 ¾” Blackout )
b. Orange speckle pattern buckle (1 ¾” )
Daisy Quilling Kit Die Cuts
3. Flower
a. Golden yellow center (1” x 9” strips)
b. Orange small petals (1” x 9” small petals)
c. Four purple large petals (1” x 9” large petals)
d. Green stripe pattern leaves (1” x 9” leaves)
Step 2: Create shoe from cut 1a. Use vintage damask cartridge to fill with desired pattern. Fold and assemble.
Step 3: Create buckle from cuts 2a-2b. Use vintage damask cartridge to fill with desired pattern. Adhere to shoe.
Step 4: Create flower from cuts 3a-3d. Assemble together. Adhere to shoe.
Step 5: Embellish as desired.
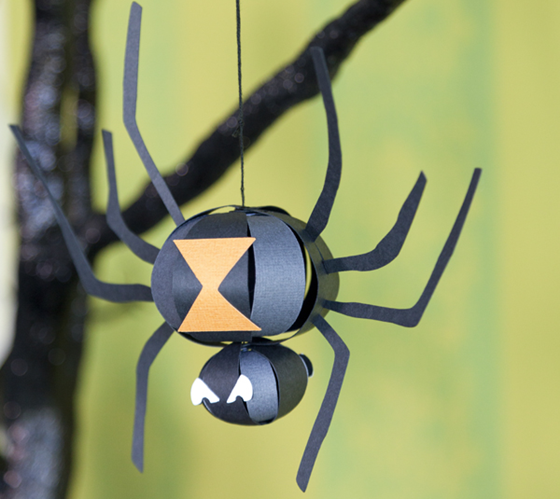
Spider Ornament
Materials:
- Cricut Craft Room® Design Software
- White Cardstock (1)
- Thread
- Dark Gray Cardstock (1)
- Adhesive
- Black Cardstock (1)
- Orange Cardstock (1)
You’ll also need:
- Cricut® Lyrical Letters Cartridge
- Cricut® Pumpkin Carving Seasonal Cartridge
- Cricut Expressions 2 Cutting Machine
- Spider Project Cut File
Instuctions:
Step 1:
Cricut® Cuts:
Use project cut file (CCR File) to create cuts
1. Spider
a. Dark gray body (Dark Gray layer)
b. Black body/legs (Black layer)
c. White eyes (White layer)
d. Orange markings (Orange layer)
Step 2: Create spider from cuts 1a-1d. Assemble and layer together.
Step 3: Embellish as desired.
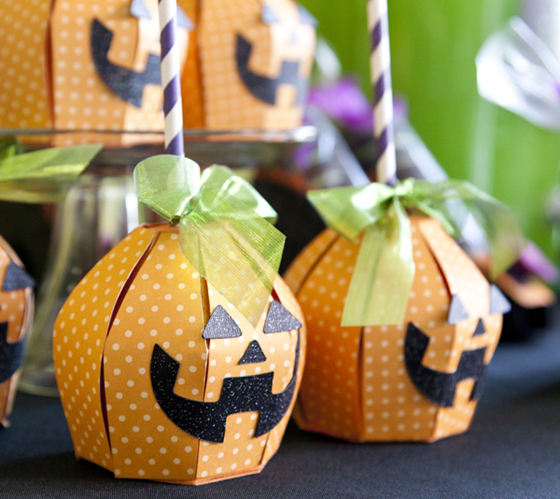
Jack O Lantern Popcorn Ball
Materials:
- Cricut® Scoring Tip
- Adhesive
- Ribbon
- Hot glue gun
- Straw
- Orange pattern paper (1)
- Popcorn ball
- Orange cardstock (1)
- Ink
- Black glitter cardstock (1)
- Hole punch
You’ll also need:
- Cricut Expression® Machine
- Cricut® Autumn Celebrations Cartridge
- Cricut® Tags, Bags, Boxes & More® 2 cartridge
- Jack O’ Lantern Cut Files
Instructions:
Step 1: Cricut® Cuts:
Tags, Bags, Boxes and More® 2 Cartridge
1. Pumpkin box
a. Score lines (8 ¼” Shift + )
b. Orange box (8 ¼” )
c. Score lines (8 ¼” Shift + )
d. Orange pattern box (8 ¼” )
Autumn Celebrations Cartridge
2. Pumpkin face
a. Black glitter face (7” Phrase Layer + )
Step 2: Create pumpkin box from cuts 1a-1d. Use hole punch as desired. Fold and assemble.
Step 3: Create pumpkin face from cuts 2a. Adhere to pumpkin box.
Step 4: Embellish as desired.
Use some of these ideas, or use them all and I’m sure you’ll have an incredible kid’s Halloween party table!
Images used with permission from Provo Craft/ Cricut. All opinions are my own.


2 comments
That shoe party favor is adorable!
I love the shoe, is fav but I visit the webside that you link to get the template and have ccr extention and I can´t open it, could you share the temp? or send by e-mail?…
Please help me!!!