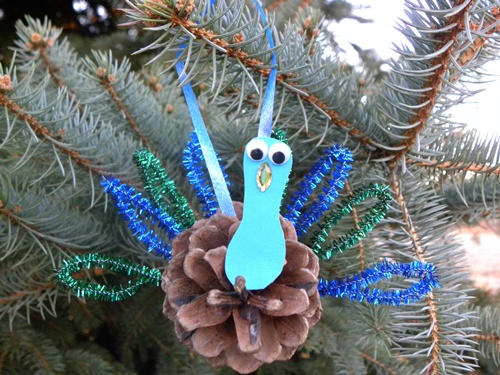
I love making a special Christmas ornament with my son this time of year. Every year we try to make at least one new ornament for the tree. This year we have plenty of pine cones under our trees, so we decided to make some things with them. I have several ideas to share with you, but first up we made this pine cone peacock ornament. It was super easy and quick to make. I love the colors and the metallic glitter when it catches the light.
Pine Cone Peacock Ornament
Materials
- 1 pine cone
- 2 green metallic pipe cleaners
- 2 blue metallic pipe cleaners
- blue card stock
- 6″ piece of blue ribbon
- Yellow stick on gem or small piece of yellow card stock
- 2 wiggly eyes
- Click to print Peacock Pattern
Instructions:

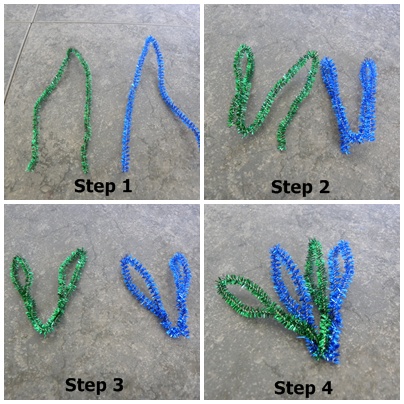
2. Fold each half in half.
3. Wrap the loose end around the center to make 2 loops from each pipe cleaner (see photo above).
4. Wrap the blue loops between the green loops so you have red and blue loops alternating. Do the same for the other blue and green pipe cleaner.

6. Twine the ends of the pipe cleaners together into one piece.
7. Put plenty of glue on the bottom of the pipe cleaner tail.
8. Press the tail to the wide end of the pine cone.
9. While the glue is drying, print and cut out the peacock body pattern, then trace around the pattern onto a blue piece of card stock and cut out the body.
10. Add the wiggly eyes, and the yellow stick on gem for a beak.
11. Tie a ribbon in the middle of the pine cone, so the front and back are fairly balanced. Knot the ends of the ribbon together to make a loop so you can hang your pine cone peacock on the Christmas tree.
I’ll be back in the next few weeks with more ornament and holiday craft ideas.


