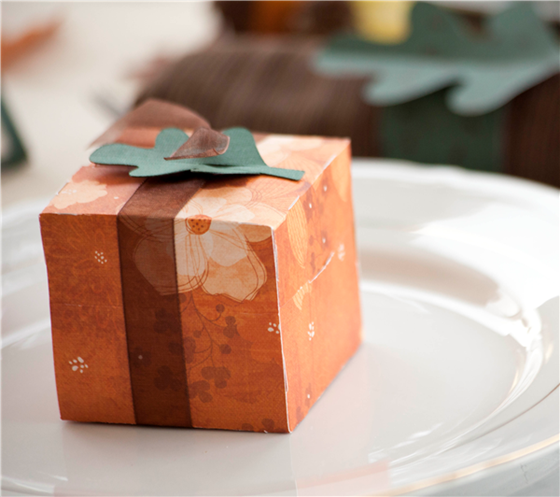
I love decorating for fall and Thanksgiving. Today I have some wonderful ideas for decorating your tablescape for Thanksgiving entertaining, courtesy of Cricut. All of these ideas are fairly easy if you have a Cricut Cutting Machine you should be able to recreate them yourself in no time!
Easy Fall Decorator Box
What you’ll need:
- Cricut Expressions Cutting Machine
- Cricut® Events Cartridge, Tablescapes – Fall & Winter
- Ribbon
- Orange pattern paper (1)
- Adhesive
- Dark green cardstock (1)
- Favor Box Cut File
Step By Step Instructions:
Step 1: Cricut® Cuts:
Tablescapes – Fall & Winter Cartridge
1. Favor box
a. Orange box (2 ½” )
b. Dark green leaf (2 ½”)
Step 2: Create box from cuts 1a – 1b. Fold and assemble.
Step 3: Embellish as desired!
This one is a little harder, but I love these unique placemats! They would look so good on my Thanksgiving table this year!
Thanksgiving Placemat Project
What You’ll Need:
- Cricut Expression® Machine
- Cricut® Speaking of Fall Classmate™ Cartridge
- Cricut® Designer’s Calendar Cartridge
- Buttons
- Medium green fabric
- Thread
- Dark green fabric
- Needle
- Gold fabric
- Iron-on fabric adhesive
- Burgundy fabric
- Woven fabric placemat
- Yellow fabric
- Light green fabric
- Brown fabric
Step By Step Instructions:
Step 1: Cricut® Cuts:
Designer’s Calendar Cartridge
1. Phrase: Give Thanks
a. Yellow phrase (5” Shift + )
b. Brown phrase (5” Shift +)
Speaking of Fall Cartridge
2. Leaves
a. Dark green leaves (4” Layers Shadow +)
b. Dark green leaves (3” Layers Shadow +)
c. Medium green leaves (4” Layers Shadow +)
d. Medium green leaves (3” Layers Shadow +)
e. Gold leaves (3” Layers Shadow + )
f. Gold leaves (4 ½” Layers Shadow + )
g. Gold leaves (3” Layers Shadow + )
h. Burgundy leaves (3” Shadow + )
i. Light green leaves (3” Layers Shadow + )
Step 2: Use iron to apply iron-on fabric adhesive to each color of fabric according to the manufacturer’s instructions. Remove adhesive back lining from fabric before creating cuts.
Step 3: Create phrase from cuts 1a-1b. Iron pieces onto placemat.
Step 4: Create leaves from cuts 2a-2i. Iron pieces onto placemat.
Step 5: Embellish as desired.
Here is the perfect finishing touch for your Thanksgiving table!
Leaf Centerpiece
What you’ll need:
- Cricut Expression Cutting Machine
- Cricut® Events Cartridge, Tablescapes – Fall & Winter
- Orange pattern paper (1)
- Brown cardstock (1)
- Brick pattern paper (2)
- Orange cardstock (1)
- Brown pattern paper (1)
- Dark green pattern paper (1)
- Leaf Centerpiece and Confetti Cut Files
Step By Step Instructions:
step 1: Cricut® Cuts:
Tablescapes – Fall & Winter Cartridge
1. Leaves
a. Brick pattern leaf (9 ½”< 3DLeaf>)
b. Brown cardstock leaf (7 ½” )
c. Two orange cardstock leaves (5 ½” )
d. Two brown pattern leaves (5 ½” )
e. Three orange pattern (3 ½”)
2. Confetti
a. Orange paper leaf (2 ½” & 3” )
b. Dark green paper leaf (2 ½” & 3” )
c. Brown leaf (2 ½” & 3” )
d. Orange leaf (2 ½” & 3”)
Step 2: Create leaves from cut 1a-1e. Fold and Assemble.
Step 3: Create confetti from cuts 2a-2d.
Step 4: Embellish as desired!
The perfect finishing touch for your Thanksgiving dinner table decorations!
Leaf Napkin Ring
What You’ll Need:
- Cricut Expressions Cutting Machine
- Cricut® Events Cartridge, Tablescapes – Fall & Winter
- Dark green pattern paper (1)
- Leaf Napkin Ring Cut Files
Step By Step Instructions:
Step 1: Cricut® Cuts:
Tablescapes – Fall & Winter Cartridge
1. Napkin ring
a. Dark green leaf (4” < LeafRng>)
Step 2: Create napkin ring from cut 1a. Fold and assemble.
Step 3: Embellish as desired.
All projects used are courtesy of Cricut. You can find more information on the Cricut Machines and Cartridges used, and even more Thanksgiving projects here: Cricut


