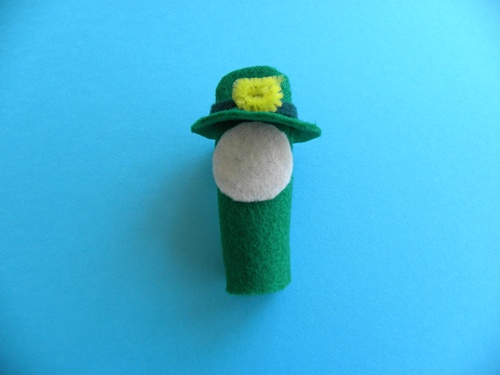
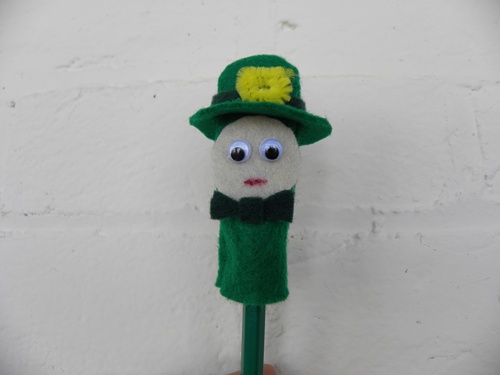
I thought it would be fun to make a little leprechaun finger puppet for St. Patrick’s Day, he would be fun for kids to use with a little leprechaun house made from an old shoe box as a stage. He would also make a fun leprechaun pencil topper, to get all your friends talking and wishing they had their own.
I think he turned out really cute! Here are the instructions if you’d like to make your own leprechaun finger puppet. It’s really simple, it took us less than half an hour to make this little guy.
The finger puppet would be a fun activity for a St. Patrick’s Day party, a school project, or just because on a rainy March day.
How To Make a Leprechaun Finger Puppet:
Materials:
- Green Felt~ I used 2 different colors
- Tan or peach colored felt for the face
- Yellow felt
- Google eyes
- Thread or embroidery thread
- Needle
- Glue
Instructions:
1. To cut out the body of the puppet, cut out two pieces of green felt twice as wide as your finger, measurements should be about 3 1/2 inches long, by 1 1/2 inches wide rounded on top.
2. Stitch the two sides together with a green thread and needle. The stitching doesn’t have to be perfect, it doesn’t show on the other side when you flip it right side out, so don’t be afraid to let the kids do the sewing (with a little adult supervision of course).
3. Cut a circle or slightly oval shape from the tan felt for the face, about 1″ diameter.
4. While you’re cutting you can also cut another circle from the green felt for a hat brim, about 1 1/2 inch diameter, cut a hole on the inside of the brim so it will fit over the top of the puppet to make the brim of the hat (see photos).
5. Cut a small strip of darker green felt (about 2″ long) for the hat band, and a small bow tie if you’d like.
6. Make a tiny gold buckle for the hat by cutting a small piece of yellow pipe cleaner and bending it into a small square.
7. Glue the face onto the front of the finger puppet, about 1/3 of the way down to leave room at the top for the hat.
8. Slide the hat brim into place over the top of the puppet, and glue it in place with a little glue. Add the hat band and the buckle and glue those in place then set the whole thing aside to dry for a few minutes.
9. Once the glue has dried, glue the google eyes to the face, add a small mouth with a red marker, and glue the bow tie in place.
You can also add arms to your finger puppet if you’d like by cutting two small strips of green felt and gluing them to the sides of the puppet.
Now you’re ready to play!
Looking for more finger puppets? Check out these penguin finger puppet instructions.


